Should You DIY That Emergency Window Repair?
A cracked or shattered pane doesn’t just rattle your nerves — it changes your priorities in a hurry. Before you decide between DIY window repair and professional window repair, treat emergency window repair like triage: stabilize the situation first, then choose the safest, most durable fix. Clear loose glass, keep kids and pets away, secure the opening from weather and intruders, and only then decide whether a quick DIY is sensible or if a specialist is the smarter call.
From there, the question isn’t “Can I?” but “Should I?” Small, contained issues can sometimes be handled with a steady hand and the right gear, while structural damage, upper-story risks, or code-bound windows demand a pro for reliable results. Your decision should protect more than the sash — it should safeguard your home, budget, and timeline. In the pages ahead, we’ll show you how to assess risk fast, choose the right path with confidence, and avoid the hidden costs that turn a quick fix into a long-term headache.
Assess the Damage and Immediate Safety Risks
Start by identifying what failed and how severely. Note the glass type: a small window crack repair on a single pane is very different from a spiderwebbed tempered panel or a fogged insulated glass unit with a failed seal. Check the frame and sash for warping, rot, or bent tracks, and test hardware — locks and latches that don’t engage can signal hidden damage. A quick flashlight test at dusk can reveal gaps, blown seals, or misalignment as light leaks through where it shouldn’t.
Mitigate immediate hazards before you touch tools. Put on cut‑resistant gloves, safety glasses, long sleeves, and closed‑toe shoes. Use a broom and a magnet or tape to collect loose shards, and vacuum with a hose (not a beater bar) to avoid scattering glass. Keep kids, pets, and foot traffic away with a closed door or visible barrier. If the opening is compromised, prioritize security and weather control: tape plastic film over smaller losses, or install a properly anchored piece of plywood for larger breaches to deter intruders and keep out rain and debris during emergency window repair.
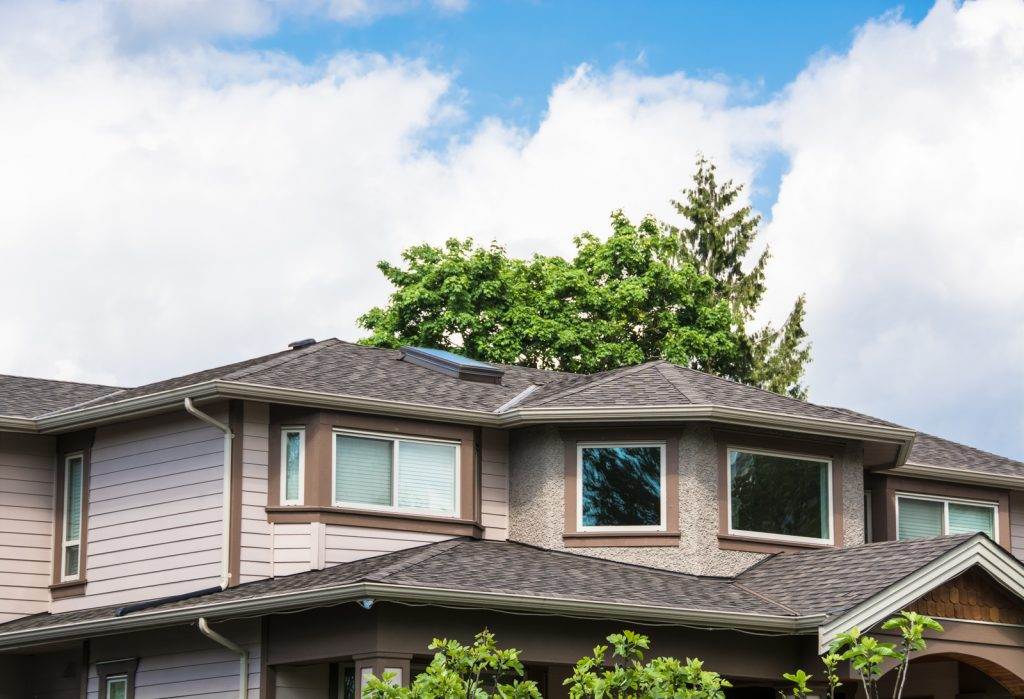
Consider exposure and location to judge urgency. Ground‑floor windows facing the street, patio doors, and basement egress units carry higher security risk and may warrant immediate board‑up. Upper stories add fall risk and often require ladders or staging — conditions that push the job toward a pro. Weather matters too: incoming storms, subfreezing temps, or heat waves can turn a minor crack into a shattered pane or drive moisture into the wall assembly, raising the stakes from simple window crack repair to full window replacement.
Document everything as you assess. Take wide and close photos of the damage, any broken hardware, and the temporary measures you’ve installed; note glass markings in the corner (tempered, laminated, Low‑E) and any manufacturer labels. This record helps you communicate clearly with a contractor, supports insurance claims, and prevents ordering the wrong glass package if a replacement is needed. With hazards contained and a clear damage profile, you can make a safer, smarter call on DIY versus calling a pro.
When a DIY Fix Makes Sense
Small, low-risk problems are fair game for a careful DIYer — think hairline cracks in an older single-pane sash, loose glazing putty that’s letting in a draft, a sticky sash that needs cleaning and lubrication, or simple hardware swaps like latches, sash locks, and tilt latches. If the glass is intact and you can work from the interior at ground level, a temporary window fix using clear film or packing tape over a hairline crack can arrest spreading until you schedule a proper repair. For wooden windows, re-bedding a pane with fresh glazing compound or adjusting a misaligned strike plate is routine work that doesn’t put you in harm’s way.
Short-term stabilization is also a reasonable DIY step when you need to weatherproof fast. Plastic film and exterior-rated tape can close small gaps; corrugated cardboard behind intact storm windows adds a wind break; and for larger damage where glass is missing, you can carefully board up window openings with plywood anchored into the framing — not just the trim — so it won’t loosen in wind. Seal the edges with weatherproof tape or flashing tape to control drafts and rain, and document the damage with photos before and after your temporary measures for insurance and warranty records.
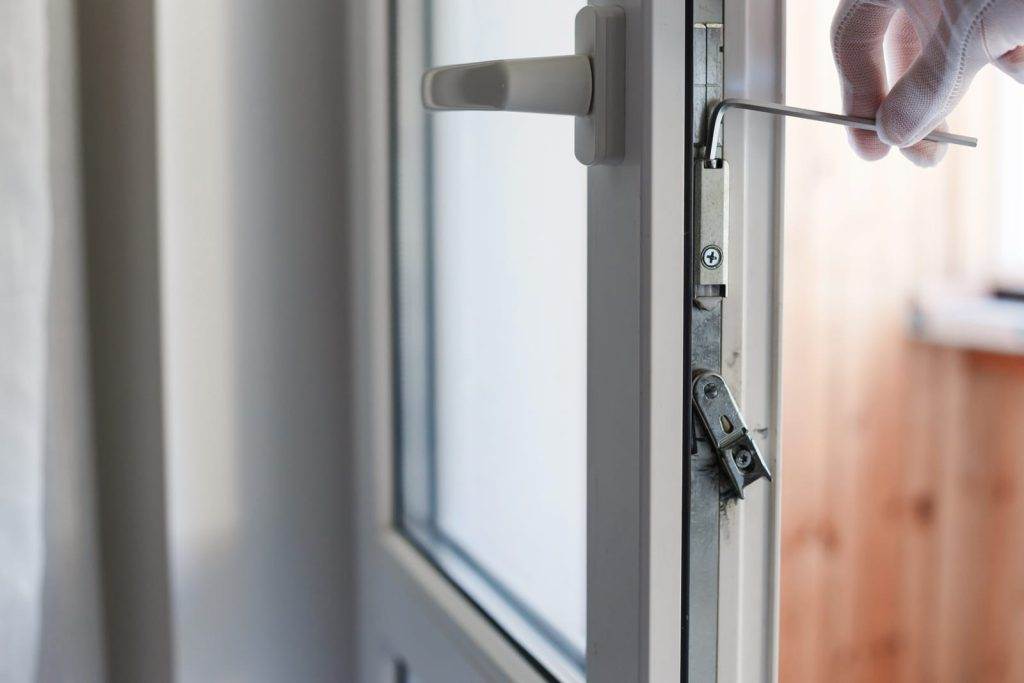
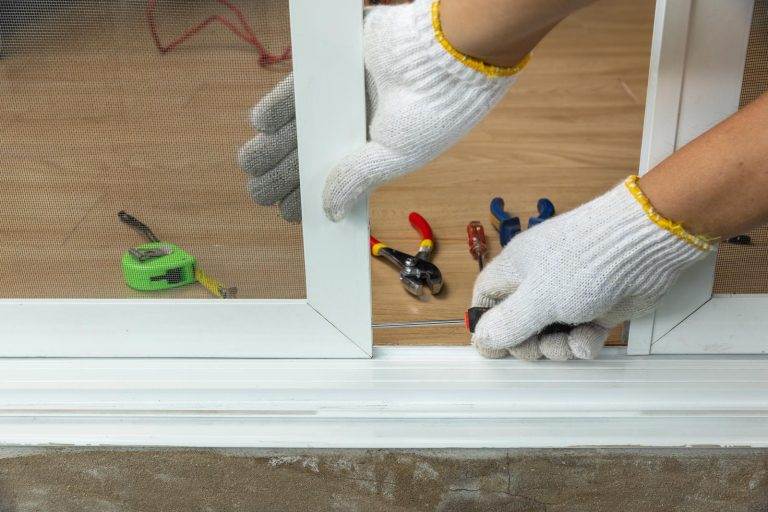
Make sure you have the right tools and protective gear before you start. At minimum, use cut-resistant gloves, safety glasses, long sleeves, and closed-toe shoes. A sharp utility knife, glazing tools, a putty knife, and a drill/driver cover most light tasks; silicone spray or dry lubricant often solves sticking tracks. Follow manufacturer guidance for your specific window type — vinyl, wood, aluminum, or fiberglass — and don’t mix materials (for example, use the correct glazing compound and backing points for wood sashes, and avoid solvent cleaners that can haze vinyl). When replacing hardware, bring the old part or detailed photos to the store to match hole spacing and finish.
A few smart boundaries keep DIY from becoming a costly mistake. If you’re stabilizing a crack, treat it as temporary only — avoid drilling, heating, or injecting resins into insulated glass units. Never remove sash balances or springs without instructions; they’re under tension. And if your “simple” fix reveals hidden issues — like spongy wood near the sill, a double-pane unit fogged between layers, or glass stamped as tempered — pause and call a pro. DIY the quick stabilization and weather-sealing, but leave structural glass, upper-story access, and anything code-related to a qualified technician.
Cost, Insurance, and Liability Considerations
DIY can seem cheaper upfront, but it can get expensive fast if the repair compromises the unit’s performance or voids a warranty. For example, prying out a fogged insulated glass unit during double-pane window repair may look straightforward, but disturbing the frame can lead to window seal failure and permanent condensation between panes — erasing energy savings and requiring a full IGU replacement. Manufacturers often require professional installation to honor warranties, and some insurers may deny future claims if an improper repair contributed to water intrusion or security issues.
Before you spend a dollar, review your policy. Homeowners, renters, and landlord insurance may cover storm damage, vandalism, or accidental breakage, but you’ll need documentation. Take clear, time-stamped photos and video from multiple angles, note the date and cause, and save receipts for temporary board-up or weatherproofing — many policies reimburse reasonable emergency mitigation. Ask about deductibles, claim impact on premiums, and whether your carrier has preferred vendors who can handle same-day board-up and measure for replacement glass.
Liability is where DIY can really cost you. Handling glass, working on ladders, or removing sashes can lead to cuts, falls, and property damage. If a tenant, guest, or passerby is injured by a falling shard or an unsecured board, you could be on the hook. Licensed professionals carry general liability and workers’ comp, so injuries to their crew or damage during the repair aren’t your financial burden. They also follow safety protocols — edge protection, proper anchoring, and correct disposal — that reduce risk on-site.
If you do opt for a temporary DIY measure, keep it conservative: secure the area, use PPE, and install weatherproof film or plywood without damaging the frame. Then get a pro to finalize the repair, especially for insulated units. This approach protects your claim, preserves warranties, and prevents compounding issues like drafts, moisture damage, and energy loss that often follow an initial window seal failure.
Materials, Tools, and Temporary Solutions
Before you touch broken glass, suit up. Essential PPE for emergency window repair includes cut-resistant gloves, safety glasses, and long sleeves; add sturdy shoes and a dust mask if you’re sweeping up shattered tempered glass. Keep a utility knife, small pry bar, glazing tools, and a drill/driver on hand. A shop vacuum with a fine filter and a magnet-on-a-stick (great for finding hidden slivers in carpet seams) can make cleanup safer and faster. For window sash repair, a painter’s multi-tool and sash saw help with stubborn stops and old putty without splintering the wood.
If you’re stabilizing damage until a pro arrives, focus on weather and security. Clear loose shards, then apply plastic film or a heavy-duty trash bag stretched taut over the opening and sealed with exterior-grade tape. On windward walls or during storms, back the film with a plywood panel anchored into solid framing — not just trim — using screws that won’t penetrate wiring or plumbing (measure frame depth first). For sliding windows, a dowel or sash lock pin can temporarily secure the opening. Avoid expanding foam around glass; it can warp frames and raise the ultimate cost of window repair.
When making a lasting repair, material compatibility matters more than speed. Match glazing compound to window material (oil-based putty for traditional wood sashes, elastomeric sealants for vinyl/aluminum). Use the correct spacers, shims, and backer rod to maintain drainage paths and avoid binding. For insulated glass units (IGUs), order by manufacturer-approved size and thickness; rely on the etched corner stamp and “daylight opening” measurements rather than rough tape measures. The wrong IGU or sealant can trap moisture, void warranties, and lead to fogging or failed seals within a season.
A few pro tips can save both time and money. Before removing cracked panes, grid the glass with painter’s tape to control shatter. Label and bag hardware as you work so reassembly doesn’t stall when the new glass arrives. If you’re repainting after window sash repair, use a thin paint line that laps onto the glass by 1/16 inch to seal the putty. And if you’re weighing DIY versus pro help, price out the consumables — quality tape, film, plywood, and sealants — since they add up; sometimes a same-day board-up from a licensed glazier costs less than a poorly executed DIY that needs rework.
Building Codes, HOA, and Landlord/Renter Rules

Local building codes decide what qualifies as a safe, legal repair — especially after an emergency. If the window serves as an egress (bedrooms and basements commonly do), it must meet minimum clear-opening size and operability standards; a temporary board-up cannot permanently reduce that opening. Areas near doors, tubs, and showers often require tempered or laminated safety glass, and many coastal or high-wind regions mandate impact-rated glazing and specific anchoring methods. If you swap in standard annealed glass where tempered is required, you could fail inspection, void warranties, and face fines — so confirm the code classification of the window before ordering materials. When in doubt, call your local building department for guidance and ask whether a repair or replacement will trigger a permit.
Community rules can be just as binding. HOAs may restrict exterior appearance, including grid patterns, frame colors, and even reflective or dark tints. Historic districts often require like-for-like profiles or approved storm panels, and some mandate wood or clad-wood units rather than vinyl. A common misstep is installing a quick tinted replacement that violates an HOA’s uniform facade rules; even in an emergency, seek written approval or an expedited permit to avoid penalties. Many associations will greenlight a neutral temporary solution (clear polycarbonate or plywood cut flush and painted to match) with a deadline for full replacement.
For renters and property managers, responsibilities are shaped by the lease and local habitability laws. Landlords typically handle structural repairs and must secure the property promptly; tenants should report damage immediately, follow broken window safety practices (keep the area cordoned off, avoid handling shards), and avoid DIY alterations that change the opening or hardware. Property managers may require you to use approved vendors for board-up and glazing, especially in buildings with lead paint, where EPA RRP rules apply. If you’re pursuing an insurance claim window damage case — storm, vandalism, or accidental breakage — document the scene with photos, police reports if applicable, and invoices for temporary measures; insurers often reimburse board-ups that prevent further loss.
Remember that temporary fixes must still respect life-safety rules: do not block an egress window, and ensure bedrooms maintain a means of escape. Keep receipts, permits, and HOA approvals together; they can smooth inspections, protect warranties, and support resale disclosures later. When regulations are layered — coastal impact codes plus HOA design controls, for example — prioritize immediate hazard mitigation first, then coordinate approvals in parallel so your permanent solution is both compliant and timely.
Long-Term Durability and Energy Performance
Sloppy or stopgap window fixes might get you through the night, but they often create hidden energy drains. A pane that’s set slightly out of square or a sash with a thin bead of caulk can invite drafts, condensation between seasons, and even mold on nearby trim — issues that quietly inflate utility bills. After any emergency window repair, test the seal: run a smoke pencil or an incense stick around the frame on a windy day, or use an infrared thermometer to spot cold spots. If you see persistent fogging inside dual panes, that’s a failed seal, not a surface issue — no amount of caulk will restore efficiency once the IGU has lost its gas fill.
Choosing quality components pays off long term. Low-E glass and properly sized insulated glass units with warm-edge spacers reduce heat loss and tame summer solar gain, while laminated options add both security and sound control. Just as critical is what you don’t see: backer rod and high-quality sealant at the perimeter, correct shimming to keep the unit plumb and square, and proper flashing (including a sill pan) to route water out, not in. These details elevate comfort and can boost appraisal value because they’re recognizable markers of a professional, energy-smart installation that aligns with building code compliance.
To prevent repeat failures, address why the window failed in the first place. Settling or racked openings can twist frames and stress glass; water intrusion from clogged weep holes or missing head flashing rots sills; and prior shortcuts — like mixing incompatible sealants — can break bonds within a season. Correct the opening, reestablish drainage paths, and match materials to the manufacturer’s specifications before you set new glass. This is where the handyman vs contractor decision matters: a skilled handyman may handle a straight swap on a ground-floor single-hung, but diagnosing structural racking, rebuilding a sill, or ordering a custom IGU is squarely in a contractor’s wheelhouse.
Finally, think beyond the repair to ongoing performance. Keep exterior sealant joints clean and inspect them annually, clear debris from weep holes, and maintain paint or cladding to protect exposed wood. After storms or a notable impact, recheck alignment and latch operation; a window that closes but doesn’t latch smoothly may be telegraphing frame movement. When in doubt, invest in a pro assessment — an extra hour now can prevent years of higher energy bills and the frustration of fixing the same problem twice.
How to Choose a Qualified Pro and What to Expect

Start by verifying that any emergency glazier you consider is fully licensed and insured, and ask for proof — certificate of insurance with workers’ comp and liability coverage in your name. Look for window-specific credentials such as AAMA/FGIA training or manufacturer authorizations for the brands in your home; for pre-1978 properties, EPA RRP lead-safe certification is a must. Strong local reviews should mention successful glass replacements (not just basic board-ups), clean job sites, and punctuality. A reputable 24/7 window repair provider will also be willing to explain glass types (tempered, laminated, IGU) and why a particular option fits your situation.
Request at least two to three written quotes that spell out the scope in plain language: emergency board-up, glass or sash type, thickness and safety rating, hardware or sealant replacement, cleanup, and disposal or recycling. Quotes should list lead times for standard versus custom units, labor and material warranties, and any fees for rush service or after-hours calls. Ask how measurements are taken (final field measure versus rough), whether they’ll photograph and document damage for insurance, and how they’ll protect flooring and landscaping during the job.
Manage expectations on timing. In true emergencies, you should see a temporary board-up within hours to secure the opening and weatherproof the space. After that, the pro will complete precise measurements; standard tempered glass may arrive in 2–5 business days, while laminated, impact-rated, or custom low-E IGUs can take 1–3 weeks. A good contractor will set a target install date, provide updates if the supplier shifts schedules, and explain interim steps to control drafts, moisture, and security until the permanent unit is installed.
Clarify logistics before you sign: who handles permits if required, HOA submission support, and access needs for upper-story work or specialty equipment. Confirm payment terms — typically a deposit for special-order glass and balance upon completion — and what voids the warranty (e.g., homeowner-applied films on certain coatings). The right pro reduces risk and hassle: fast stabilization now, meticulous measurement, code-compliant materials, and a clean, warrantied installation when the glass arrives.